Part 1: Clean up and making an inkbrushed look
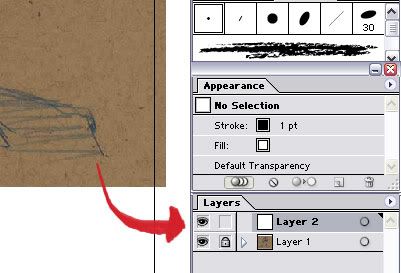
Once you've opened a new document in illustrator, goto File>Place and find your pencil drawing. Once it has been placed, resize it to fit in your work area.

Once your drawing is sized and set, lock that layer and create a new layer to make your outline on.
Choose the Pen Tool and start going over your drawing by left clicking with your mouse and making points along the line.
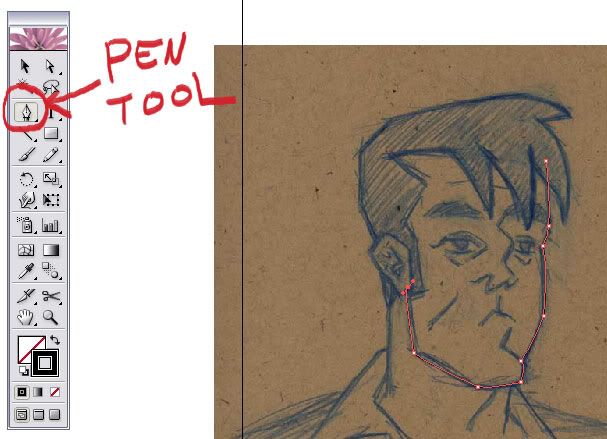
To make a curve, when you left click, keep the left mouse button pressed down and drag with your mouse.

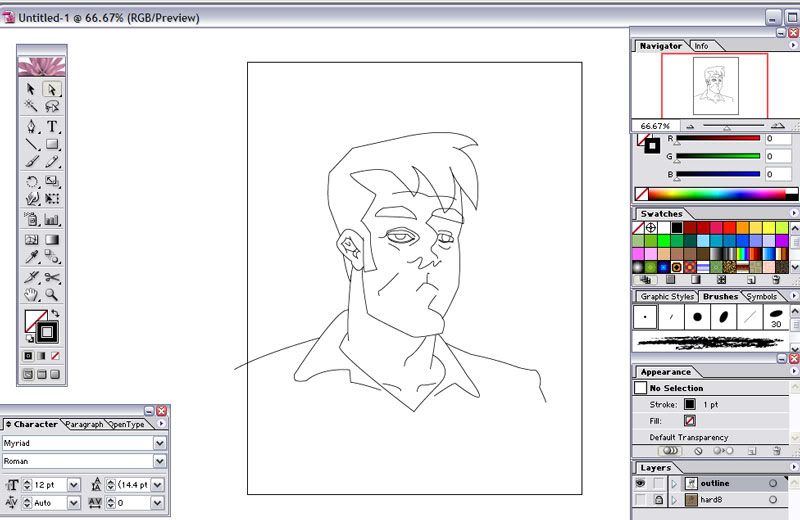
Once you've finished outlining your drawing, hide the drawing layer. At this point you can use the white arrow to adjust your lines and to adjust your curves by manipulating the bezier handles (they're the lines with the ball at the end that come from the points at the ends of the curve).
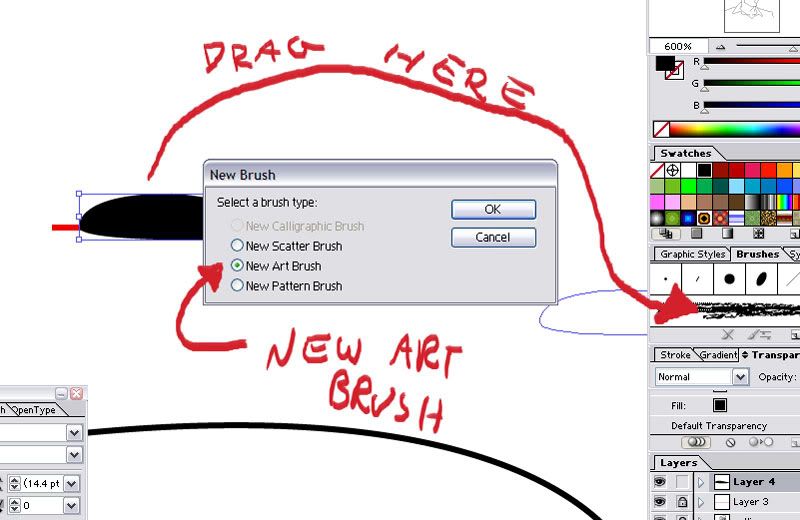
Once everything is adjusted, it's time to make a new brush. I start by creating a new layer on which i'll use the Pen Tool to make a perfectly straight red line (to make the line perfectly straight, make one point by left clicking with the mouse and then holding the Shift button when left clicking to make the next point). Now that you have a perfectly straight red line, lock that layer and create another layer on top of if. Using the red line as a guide, I'll use the pen tool to make a shape the looks like a brush stroke, filled with black and with no outline.
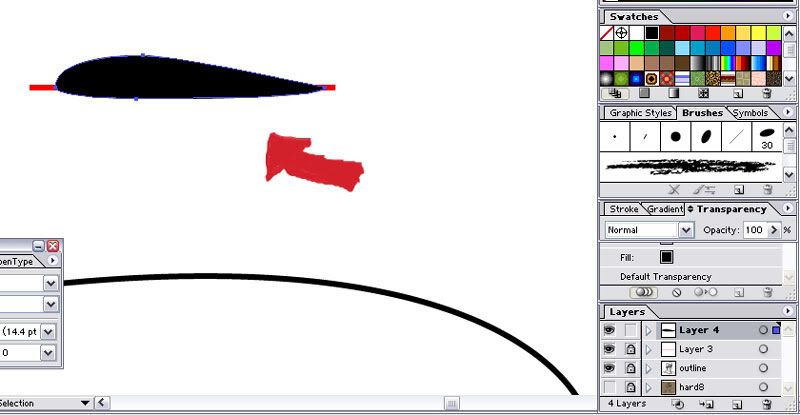
Using the black arrow, click on the brush stroke shape and drag it into your Brushes pallette. A box will pop up, choose New Art Brush and hit OK.
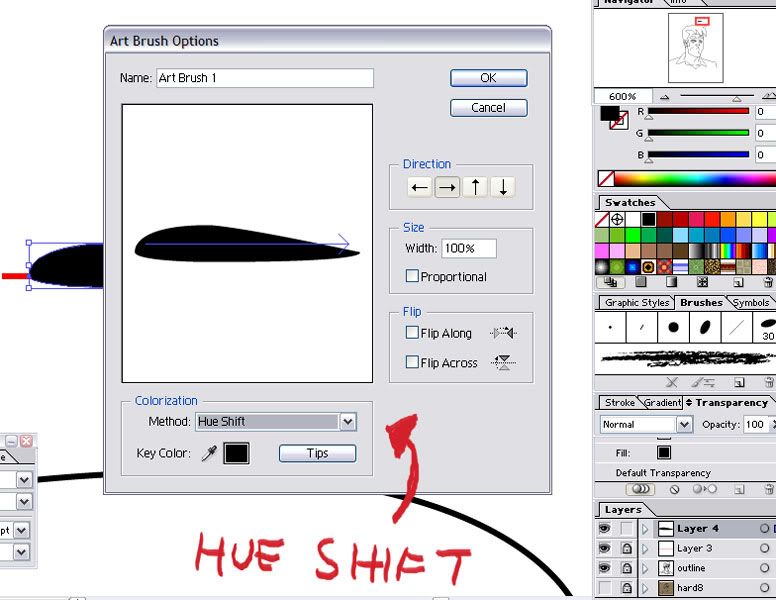
Another box will pop up, for colorization method, choose Hue Shift. This will allow you to change the line color later on. Congrats! you've just created a custom brush! Now let's make another.
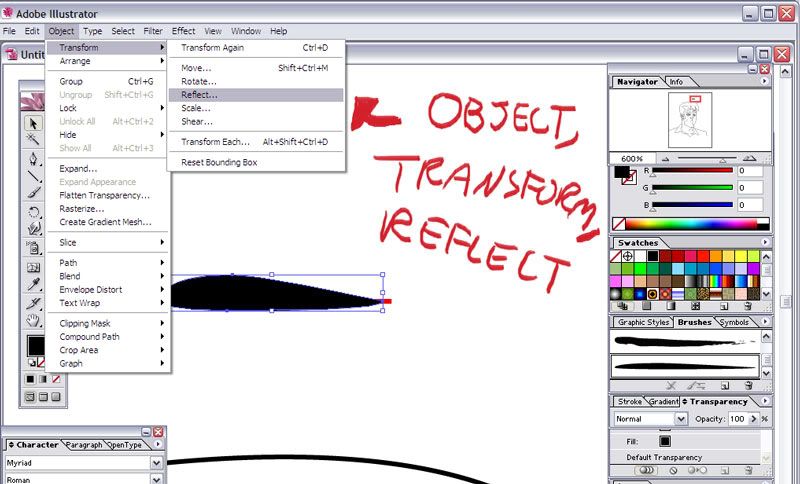
Click on the brush shape and goto Object>Transform>Reflect.
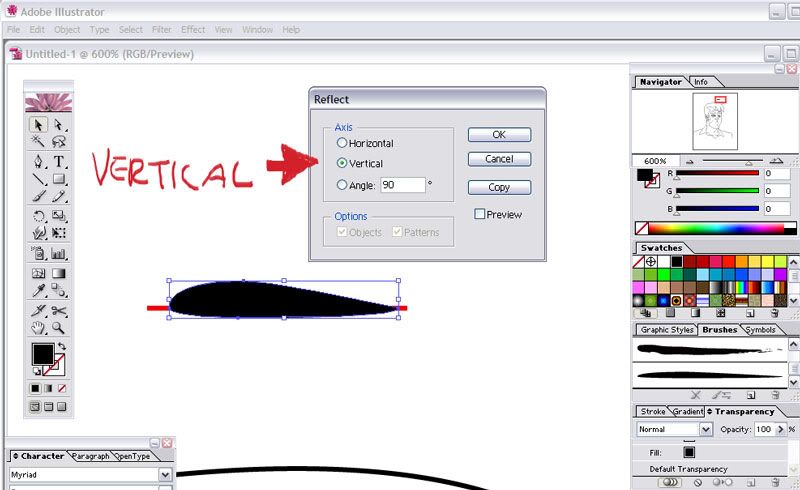
When the reflect box opens choose Vertical then hit OK. This will make a vertical reflection of the original brush. duh.
Now grab this new brush shape and drag it to the Brushes pallette and fallow the same steps as before.

you can now delete the two layers you just created to make the brush shape.
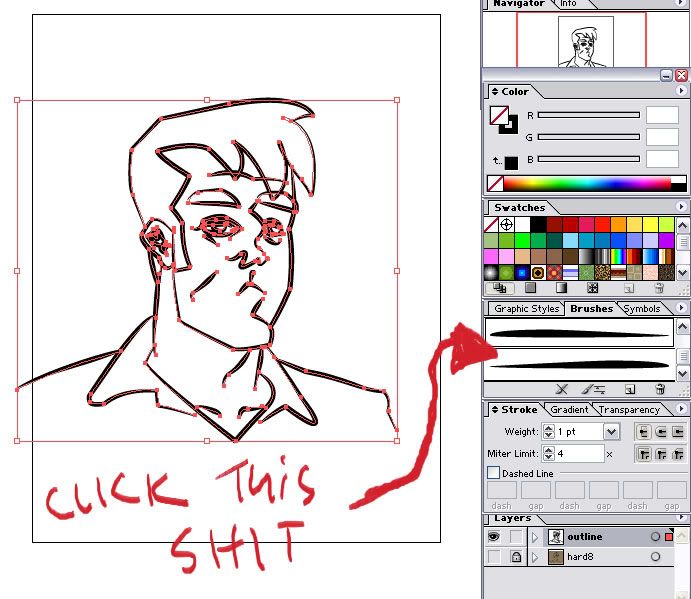
Select all the lines.
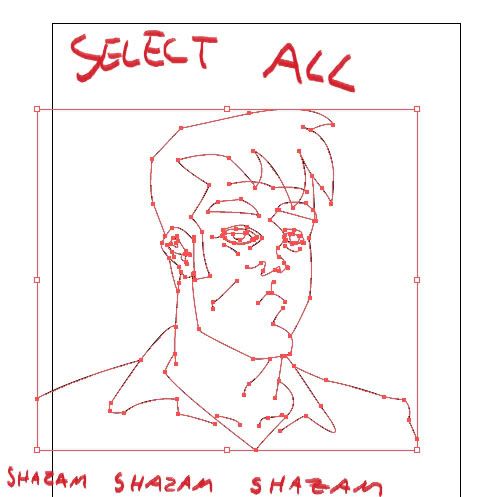
With all the lines selected, click one of the new brushes you just made in the Brushes pallette.
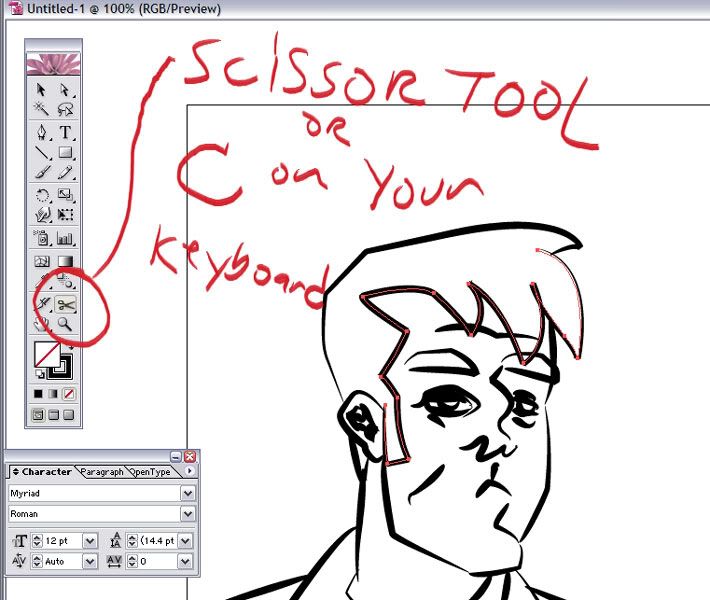
You can use the scissor tool to cut the lines that over lap or to seperate lines that might be too long.
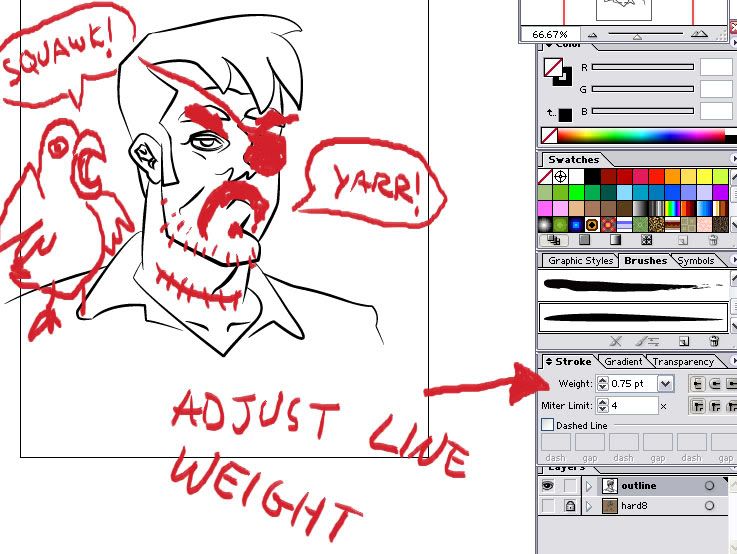
Now all that's left is to adjust the line width and choosing which of the brush shapes you created works best.
That's about it. This is the way Mike Daley taught me and has worked pretty well for me. It's not perfect, so if you have a steady inking hand, go that way. I don't, so this method helps my work look alot cleaner.
I'll post part 2 soon.

5 comments:
wow! totally helpful. this tutorial was hyped to me and it lived up to it's expectations. I am thoroughly satisfied and hereby owe you a drawing and/or a beer!
Thanks Erich!!
I don't know what the proper way to use Illustrator is either, but I go through the same steps. I want to know how to get that awesome pirate/parrot feature! Please do a tutorial on that!
That's the most easily explained tutortial I've ever read...
You should really put out a book. Most PS or Illustrator tutorials have me confused at step 1.5!!!!
Thanks! This is all pretty much how Mike Daley (biocreep.com) taught me, I just broke it down to a level that even I could understand. Oh, and added pirate effects. Arrrrrr....
WOW!
Great, Thank you for posting..I am going to try...
Post a Comment